How to Choose Diamond Polishing Pads?
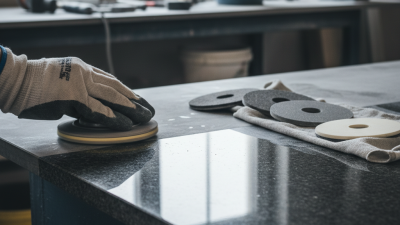
Choosing Diamond Polishing Pads is a technical decision, not a simple purchasing task. The right pad must match the stone, machine, grit sequence, water flow, and required finish. A pad that works beautifully on granite may scratch engineered quartz or leave resin marks on marble. Small details matter. Edge pressure, operator speed, and worn tooling can change the result within minutes.
Industry data supports the importance of this decision. Grand View Research’s 2024 Diamond Tools Market report identifies construction, stone processing, and infrastructure as major demand areas for diamond tooling. Its analysis also points to continued growth in precision cutting and surface-finishing applications. The U.S. Geological Survey’s Mineral Commodity Summaries 2024 describes industrial diamond as essential for cutting, grinding, drilling, and polishing operations. These reports do not replace workshop testing, however. Market growth cannot tell you which bond, grit, or diameter suits a specific slab.
Experienced fabricators usually compare pad performance through measurable results. Check gloss, scratch visibility, heat generation, water consumption, working speed, and pad life. A 50-grit metal-bond pad may remove lippage quickly, while resin-bond pads usually refine the surface more gently. Hybrid pads can reduce transition problems, but they are not magic. They may underperform on unusually hard stone or poorly prepared surfaces.
This guide explains how to choose Diamond Polishing Pads with practical selection criteria. It considers material hardness, grit progression, bonding system, machine compatibility, and finishing expectations. Some recommendations will need adjustment. Real stone varies, and even reliable methods sometimes fail. A controlled test area remains the safest evidence before full production.
Identify the Surface, Material, and Polishing Requirements
Choosing diamond polishing pads begins with identifying the surface, not selecting grit immediately.
A concrete floor, granite countertop, and glass edge require different pad behavior. Check whether the surface is flat, curved, coated, scratched, or uneven. Loose coatings may clog the diamonds and create misleading polishing results. On concrete, inspect aggregate exposure and hardness before starting.
A small test area often reveals more than a product chart. Use the same water flow, pressure, and machine speed planned for the job. Keep notes. This is key.
Material hardness affects cutting speed, heat, and pad wear. Softer stone may need lighter pressure and a less aggressive starting grit. Dense granite usually demands steady cooling and controlled machine movement. Concrete can vary within one room, especially near repairs or joints. Watch the slurry. Its color and texture can show whether the diamonds are cutting properly.
Dry polishing can improve visibility, but dust control and suitable respiratory protection remain essential.
Your polishing requirements should define the pad sequence. Remove deep scratches with a stronger metal-bond step, then refine the surface with progressively finer resin bonds. Do not skip grits when visible lines remain.
I once moved forward too quickly and had to repeat two stages. That mistake was avoidable.
Match the pad diameter, machine speed, edge profile, and wet or dry method to the equipment. Inspect the surface under angled light between stages. A glossy appearance can hide uneven refinement, particularly around edges.
Compare Diamond Pad Types, Grits, Bonds, and Sizes
Choosing diamond polishing pads starts with the surface, not the catalog picture.
The U.S. Geological Survey’s 2025 Mineral Commodity Summaries identifies polishing as a major industrial use of synthetic diamond. That matters because synthetic diamond offers controlled grain size and consistent cutting action.
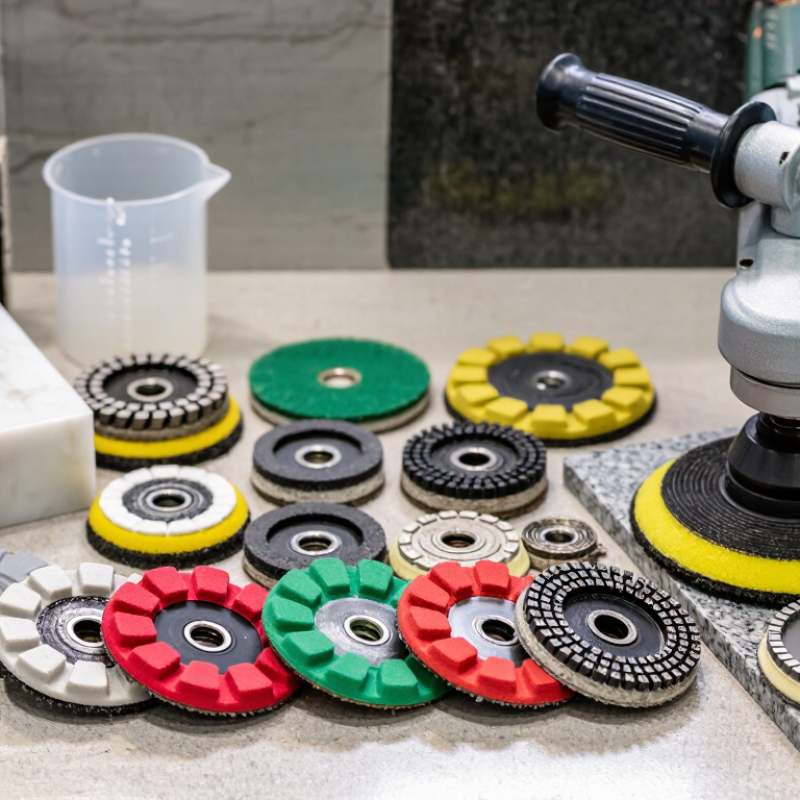
For rapid coating or concrete removal, metal-bond pads usually work best.
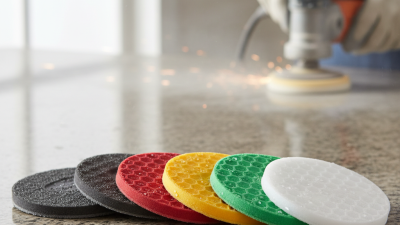
Resin-bond pads create a finer finish, while hybrid bonds balance cutting speed and surface refinement.
Electroplated pads can cut aggressively, but their exposed diamonds may wear unevenly.
Grit selection should follow the surface condition.
Coarse 30 or 50 grit removes scratches and weak material. Medium 100 to 200 grit refines visible marks. Grits above 400 support polishing and gloss development.
Numbers are not perfectly interchangeable between manufacturers, so confirm the stated micron range.
I once selected grit by number alone. The finish looked dull.
Pad size also changes pressure and handling.
A 3-inch pad concentrates force for edges and repairs. Four- and five-inch pads suit many handheld machines. Seven-inch pads cover larger areas but demand stable equipment and even pressure.
Match the bond to the floor hardness, then match the grit to the scratch depth.
Check whether the process is wet or dry. Water reduces heat and dust, while dry polishing needs suitable extraction and ventilation.
Industry abrasives reports, including Grand View Research’s 2024 market assessment, continue to show strong demand for engineered abrasive solutions, but market growth does not replace testing.
Try one pad on a small area.
Observe wear, heat, and scratch clarity before committing.
Match the Pad to Your Machine and Working Conditions
How to Choose Diamond Polishing Pads?
Choose the pad for your machine first. A planetary grinder needs pads that match its plate size, attachment system, and operating speed. A single-disc machine usually requires a different arrangement. Check the manufacturer’s maximum RPM before testing any pad. Heat builds quickly on small machines.
Then study the working conditions. Hard concrete often needs a softer bond, allowing fresh diamond exposure. Soft, abrasive concrete usually performs better with a harder bond. Start with a medium grit, such as 60 or 80, when the surface condition is uncertain. Wet polishing controls dust and can extend pad life, but cleanup takes longer. Dry polishing is faster, yet dust extraction must be reliable. OSHA limits respirable crystalline silica exposure to 50 micrograms per cubic meter over an eight-hour shift. That figure should influence equipment choices, not just safety paperwork.
Tips: Match grit to the scratch pattern, not appearance alone. Keep the pad moving. Use water sparingly on dense concrete. Record speed, pressure, grit, and square metres completed. The Concrete Polishing Association of America stresses consistent testing because slab hardness can change within one floor. In my experience, a pad that cuts well in one room may glaze in another. That is normal. Still, I sometimes change grit too quickly. A short test area, inspected under side lighting, prevents expensive guesses. Stop if the surface shows burning, deep swirls, or uneven exposure.
Choose a Step-by-Step Polishing Sequence
How to Choose Diamond Polishing Pads?
A reliable polishing sequence begins with the floor, not the pad. Check hardness, aggregate exposure, cracks, and surface contamination. On a medium-hard concrete floor, many contractors start with 30 or 50 grit diamonds. These pads remove lippage and open the surface. The next steps may include 100, 200, 400, 800, and 1,500 grit. Each stage should remove the scratches from the previous stage. Do not skip too quickly. A glossy floor can still hide deep sanding marks.
Pad selection depends on the concrete matrix. Soft concrete often needs a harder-bond diamond. Hard concrete may cut better with a softer bond. Wet grinding controls dust, but it creates slurry that needs proper collection. OSHA’s respirable crystalline silica standard limits exposure to 50 micrograms per cubic meter over eight hours, with a 25-microgram action level. NIOSH also recommends engineering controls, including wet methods and local exhaust ventilation. These figures make dust control part of polishing quality, not just worker protection.
Tips: Clean the floor between stages. Inspect it under side lighting. If scratches remain, repeat the current grit. Do not trust shine alone. Record grit, speed, water, and pressure for each area. Results can vary across one slab, and that is where my own early assumptions often failed. A slower sequence usually produces a more consistent finish.
Check Pad Quality, Safety Features, and Long-Term Value
Choosing diamond polishing pads requires more than checking the grit number. Inspect the segment bond, diamond distribution, backing plate, and edge finish. Uneven segments can create visible swirl marks on concrete. Excessive runout may also cause vibration and operator fatigue. Ask for batch testing data, not only attractive product photos. Small details matter.
Safety features deserve equal attention. Confirm the pad’s maximum rated RPM matches the machine. Check the backing for cracks, loose segments, or distorted holes before every use. Wet polishing can reduce airborne dust, but it does not remove every hazard. OSHA’s Respirable Crystalline Silica standard limits exposure to 50 micrograms per cubic meter over eight hours. NIOSH also identifies respirable silica as a serious occupational risk in its Hazard Review, Publication 2002-129. Use water control, ventilation, suitable respiratory protection, and proper guards.
Long-term value depends on cost per finished square meter, not purchase price alone. Record cutting speed, usable pad life, water consumption, and rework hours across several jobs. A pad lasting twice as long may still disappoint if it leaves inconsistent gloss. That happens. Trialing a small batch on the actual floor is wiser than trusting specifications alone. Review the results with the operator, because laboratory ratings rarely capture every surface condition.