

page_banner

7 Best Diamond Pads for Concrete Polishing?

Choosing the right Diamond Pads can transform a dull concrete slab into a smooth, reflective surface. It can also expose every mistake in preparation. Grit size, bond hardness, water use, machine pressure, and floor condition all influence the final result. A pad that performs beautifully on hard concrete may cut too slowly on a softer slab. That difference matters.

Bob Harris, a respected decorative concrete educator and author, often emphasizes this practical principle: “A polished concrete floor is only as good as the preparation beneath it.” The quote captures why product comparisons need more than marketing claims. Real performance depends on measurable factors, including scratch removal, cutting speed, edge stability, heat control, and finish consistency. It also depends on the operator’s judgment.

This guide examines seven Diamond Pads for concrete polishing, covering both resin and metal-bond options. Each choice is considered for real jobsite conditions, from dusty renovation floors to freshly prepared commercial slabs. We will look at durability, grit progression, compatibility, and value. Some pads may deliver an impressive shine but wear quickly. Others may last longer while leaving deeper scratches. There is no perfect pad for every floor.

That is the part many buying guides overlook. Concrete changes from room to room. A reliable selection process must allow for testing, adjustment, and occasional failure. Small test areas can reveal more than a product label. Expect practical comparisons, clear limitations, and recommendations grounded in surface behavior rather than exaggerated promises.
7 Best Diamond Pads for Concrete Polishing?

Understanding Diamond Pads and Concrete Polishing Needs

Concrete polishing starts with the slab, not the pad.

Diamond pads cut exposed cement paste, scratches, and uneven areas. Their performance depends on concrete hardness, aggregate size, moisture, and the finish you want. A soft, dusty slab may need a harder diamond bond. Dense concrete often responds better to a softer bond. I check a small test area before committing to the whole floor.

The seven most useful choices usually include coarse metal-bond pads, medium metal-bond pads, transitional hybrid pads, fine resin pads, dry-polishing pads, wet-polishing pads, and flexible edge pads.

Coarse grits, such as 16 or 30, remove deep marks and coatings. Medium grits refine the surface. Fine resin grits create a smoother, more reflective finish.

Wet pads control dust and heat, while dry pads improve convenience but require careful dust extraction. Edge pads must follow the floor’s profile without gouging corners.

Pad selection is not perfectly predictable. I have seen a grit that worked well on one room perform poorly beside a repaired section. Check the floor often. Feel the surface after each pass, and watch for dark heat marks or uneven scratch patterns. Keep the machine moving steadily. Pressing harder rarely fixes the wrong bond. Sometimes, stopping to change pads saves more time than forcing a weak combination.

How to Choose the Right Diamond Pad for Each Polishing Stage

7 Best Diamond Pads for Concrete Polishing?

Choosing the right diamond pad depends on the concrete, surface damage, and polishing stage. I usually begin with a coarse metal-bond pad, such as 30 or 50 grit, to remove glue, paint, and uneven spots. Use light pressure and steady passes. Heavy pressure can create deep scratches that take longer to remove.

Move to 80 or 100 grit when the surface becomes more even. A transition pad then removes harsh metal scratches before resin polishing begins. Resin pads around 100, 200, and 400 grit refine the surface and develop a clearer sheen. For higher gloss, continue with 800 grit or finer pads. The seven useful stages are coarse cutting, medium cutting, fine cutting, transition work, initial resin polishing, gloss refinement, and final burnishing. Pad choice should follow the floor’s response, not a fixed schedule.

Tips: Clean the floor between grits. One remaining coarse particle can leave visible lines. Check the surface under strong side lighting. Keep the pad moving, and use enough water to control dust when wet polishing. Dry polishing may reveal defects faster, but it needs reliable dust extraction. I once changed grits too early and trapped scratches beneath a glossy finish. That mistake still influences my inspections. Test a small area first. Concrete varies, sometimes within the same room.

Seven Top Diamond Pad Types for Concrete Surface Preparation

Seven Top Diamond Pad Types for Concrete Surface Preparation

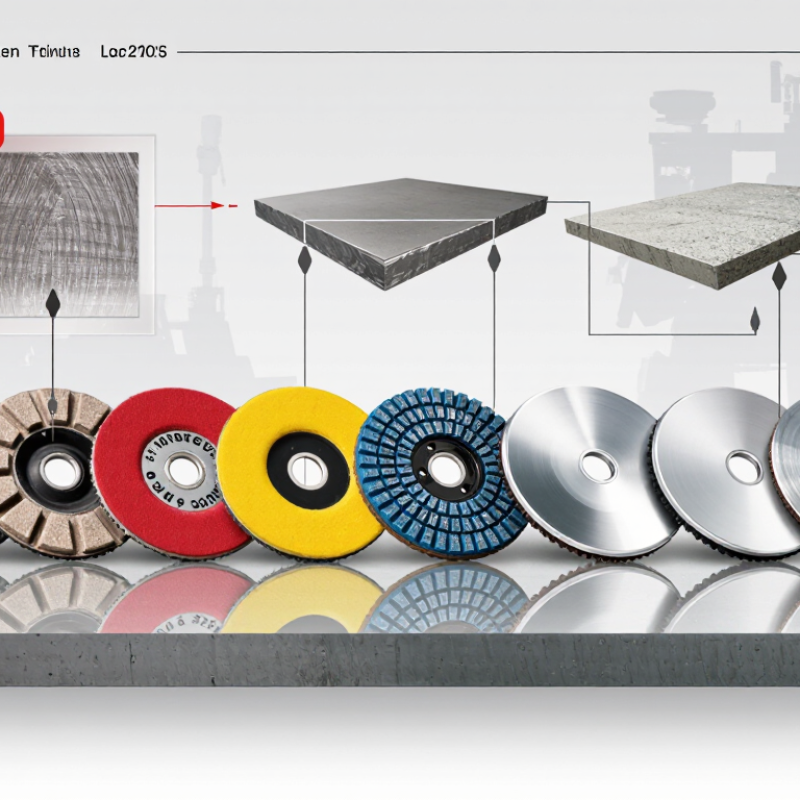
Concrete preparation begins with choosing the right diamond pad for the surface condition. Metal-bond pads remove rough laitance, paint residue, and shallow scratches. PCD pads cut through thick coatings, but they can gouge soft concrete. Hybrid pads provide a gentler transition between aggressive grinding and polishing. Resin-bond pads refine visible scratches and create a smoother surface. Wet polishing pads reduce dust and heat during detailed work. Dry polishing pads offer faster setup and easier cleanup. Edge pads reach corners that large machines often leave behind.

In my experience, pad selection depends on hardness, moisture, coating thickness, and the desired finish. A dense slab may resist coarse diamonds longer than expected. Soft concrete can shed quickly and expose uneven aggregate. I once changed to a finer pad too early, and the old scratches remained visible under strong lighting. That mistake reinforced one lesson: inspect the floor after every pass. Surface preparation is rarely perfectly predictable.

Tips:

Test a small area before treating the whole floor. Keep the machine moving to prevent circular marks and heat buildup. Vacuum dust between passes, especially before resin polishing. Record the grit, machine speed, and surface response. This simple log helps, although it cannot replace careful observation. If edges look darker, adjust pressure instead of forcing the pad.

Comparing Grit Levels, Bond Types, Durability, and Finish Quality

7 Best Diamond Pads for Concrete Polishing?

Choosing the best diamond pad depends on grit, bond, floor hardness, and the finish required.

A 16/20-grit metal-bond pad removes coatings and deep scratches quickly. It is durable, but it can leave aggressive marks.

A 30/40-grit pad cuts more evenly and suits heavily worn concrete. For medium grinding, a 60/80-grit metal-bond pad offers strong stock removal with better control.

A 100/120-grit hybrid pad can reduce visible transition lines between metal and resin tools. It wears faster than metal, yet produces a cleaner surface. A 200-grit resin pad refines the floor and prepares it for polishing.

A 400-grit pad creates a soft satin appearance when the concrete is uniform. For higher clarity, an 800-grit pad can improve light reflection, although it may reveal uneven aggregate or overlooked scratches.

Bond hardness matters as much as grit.

Soft-bond pads usually cut hard concrete better, while hard-bond pads last longer on softer floors. I have found that water control also affects durability and finish quality. Too much slurry can hide scratches; too little water can overheat the pad.

Not perfect.

Concrete is rarely consistent across an entire room. Edges may polish differently from open areas, and repaired sections can respond unpredictably.

Checking the floor after each grit prevents expensive rework. A small test area remains essential, even when the pad specifications appear suitable.

How to Use and Maintain Diamond Pads for Consistent Results

Concrete polishing becomes more predictable when diamond pads are used with a controlled process. Choose the grit according to the floor’s condition, not appearance alone. Coarse pads remove scratches, glue, and uneven cement paste. Medium grits refine the surface. Fine pads develop clarity and a smoother touch. Keep it simple. Test one small area before treating the entire floor. This reveals hidden soft spots, exposed aggregate, and moisture problems.

Use enough water to control dust and heat, but avoid flooding the work area. Excess water can hide scratches and slow pad movement. Move the machine in overlapping passes at a steady pace. Do not rush. Keep the pad flat, because tilted pressure can create swirls or uneven wear. I once increased machine pressure to remove a stubborn mark, but the result was a darker circular patch. Less force and another pass would have been wiser.

Maintenance affects consistency as much as pad selection. Rinse pads immediately after use, then remove trapped slurry with a soft brush. Inspect the segments for glazing, cracks, or uneven wear. A glazed pad may slide without cutting effectively. Rotate usable pads between jobs when practical. Store them dry and flat, away from direct heat. Record the grit, water level, machine speed, and floor response. These notes support better decisions, although they will not replace a careful visual check under strong side lighting.

7 Best Diamond Pads for Concrete Polishing: How to Use and Maintain Them for Consistent Results

Rank Diamond Pad Type Best Application Recommended Grit Range Wet or Dry Use Typical Machine Speed Main Advantages Important Usage and Maintenance Tips
1 Metal-Bond Grinding Pad Removing surface coatings, lippage, laitance, and severe concrete unevenness 16–30 grit Wet or dry, depending on dust-control requirements 600–1,200 RPM Fast stock removal; long service life; effective on hard concrete Keep the machine moving to avoid gouging. When used dry, connect a suitable industrial dust extractor. Clean the segments regularly to prevent loading.
2 Hybrid-Bond Transitional Pad Blending scratches left by metal tools before resin polishing 30–80 grit Wet or dry 500–1,000 RPM Smooth transition between aggressive grinding and fine polishing; reduces deep scratch patterns Use overlapping passes and inspect the floor after each grit. Remove slurry or dust completely before changing to the next grit.
3 Resin-Bond Polishing Pad Progressive polishing of cured concrete after grinding and honing 100–400 grit Usually wet; some designs are suitable for dry polishing 500–1,200 RPM Produces a uniform honed surface; removes finer scratches efficiently Do not skip grits unless the previous scratch pattern has been fully removed. Rinse pads after use and allow them to dry flat.
4 Fine-Polishing Pad Developing clarity, reflection, and a smooth polished finish 800–1,500 grit Wet or dry, based on the pad design and floor condition 800–1,500 RPM Improves gloss and removes fine haze or micro-scratches Use light pressure and clean water when working wet. Vacuum or dust-mop thoroughly between steps so loose abrasive particles do not create random scratches.
5 Ultra-Fine Burnishing Pad Final gloss enhancement and routine polishing of already-finished concrete 1,500–3,000 grit Dry 1,000–2,000 RPM Enhances sheen quickly; useful for maintenance between full restoration cycles Use only on a clean, fully cured surface. Avoid excessive pressure and heat buildup. Replace the pad when the working face becomes glazed or uneven.
6 Edge Diamond Pad Polishing along walls, columns, steps, and other areas inaccessible to large machines 30–3,000 grit Wet or dry, depending on the tool and pad specification 1,500–4,500 RPM Reaches corners and vertical edges; supports consistent results across the entire floor Use a compatible hand grinder with a guard. Keep the pad flat against the surface and control the tool carefully to prevent edge chipping and uneven marks.
7 Maintenance Diamond Pad Light cleaning, surface renewal, and restoring gloss on polished concrete 800–3,000 grit Usually used wet or with a controlled spray of cleaning solution 150–600 RPM Extends the service life of a polished floor; removes light scuffs without aggressive grinding Remove grit and spills before use. Work in small sections with even pressure, rinse the pad frequently, and never use it to remove thick coatings or deep damage.
General operating guidance: Select the pad according to concrete hardness, surface damage, desired finish, and machine type. Always test a small area first, use the correct dust or slurry-control method, clean the floor between grit stages, and store diamond pads in a dry place away from direct heat.